

こんにちは、福原です。
AWS Amplifyを使用してWEBアプリを作りたいと思い、以下のチュートリアルを実施してみました。
チュートリアルを進めていく中で詰まったところを記載しているので、参考にしていただけると嬉しいです。
初めにReactアプリを作成します。
以下のコマンドで実行します。
以前の記事で環境構築について記載しているので、Node.jsのインストールなど参考にしてください。
| npx create-react-app todo |
| Creating a new React app in /Users/xxxxxx/aws/react/todoapp. |
| ~省略~ |
| Happy hacking! |
| cd todo |
| npm start |
| Compiled successfully! |
| You can now view todo in the browser. |
| Local: http://localhost:3000 |
| On Your Network: http://192.168.20.208:3000 |
| Note that the development build is not optimized. |
| To create a production build, use npm run build. |
| webpack compiled successfully |
ブラウザが立ち上がり、以下画面が表示されるとOKです。
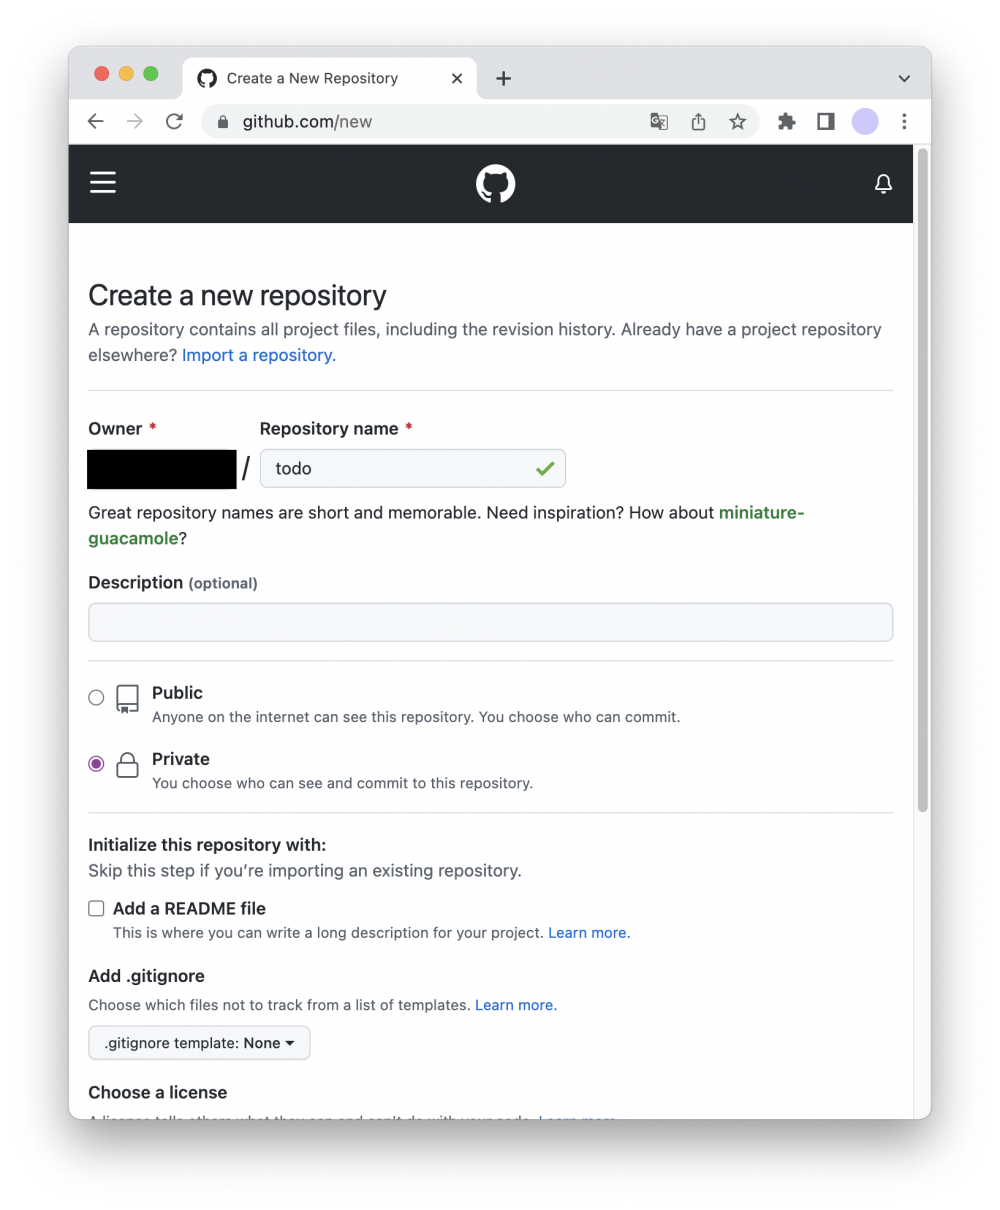
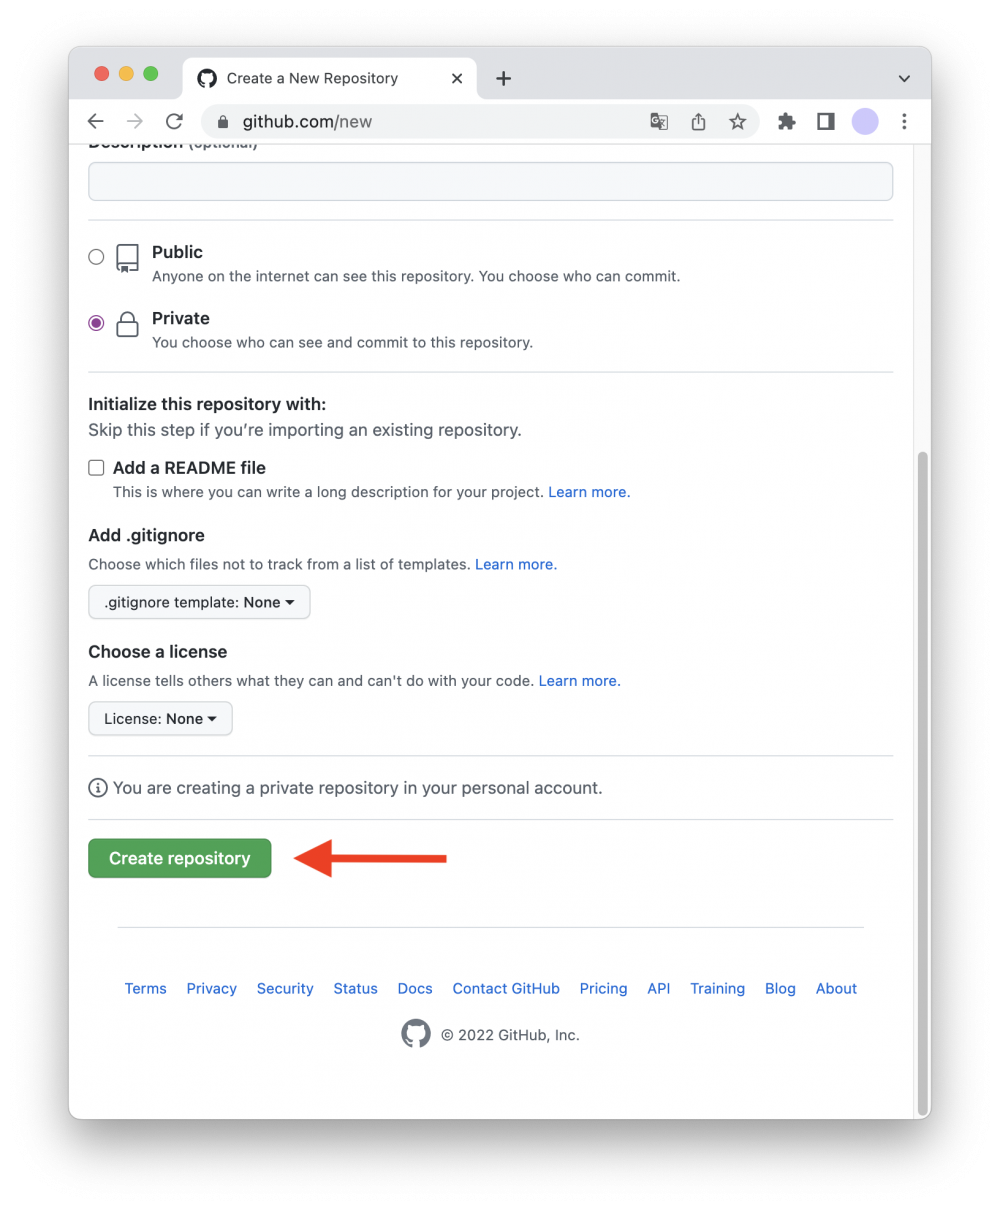
GitHubでリポジトリを作成します。
作成したReactアプリのGitを初期化します
初期化の前にReactアプリの.gitディレクトリを削除
※削除しないと、初期化できないため
| ls -al | grep git |
| drwxr-xr-x 12 xxxxxx staff 384 8 24 13:31 .git |
| - rw-r--r-- 1 xxxxxx staff 310 8 24 13:31 .gitignore |
| rm -rf .git/ |
作成したリポジトリにアプリケーションをプッシュします
| git init |
| Initialized empty Git repository in /Users/xxxxx/aws/react/todo/.git/ |
| git remote add origin https://github.com/username/todo.git |
| git remote -v |
| origin https://github.com/username/todo.git (fetch) |
| origin https://github.com/username/todo.git (push) |
| git add . |
| git commit -m "initial commit" |
| git push origin master |
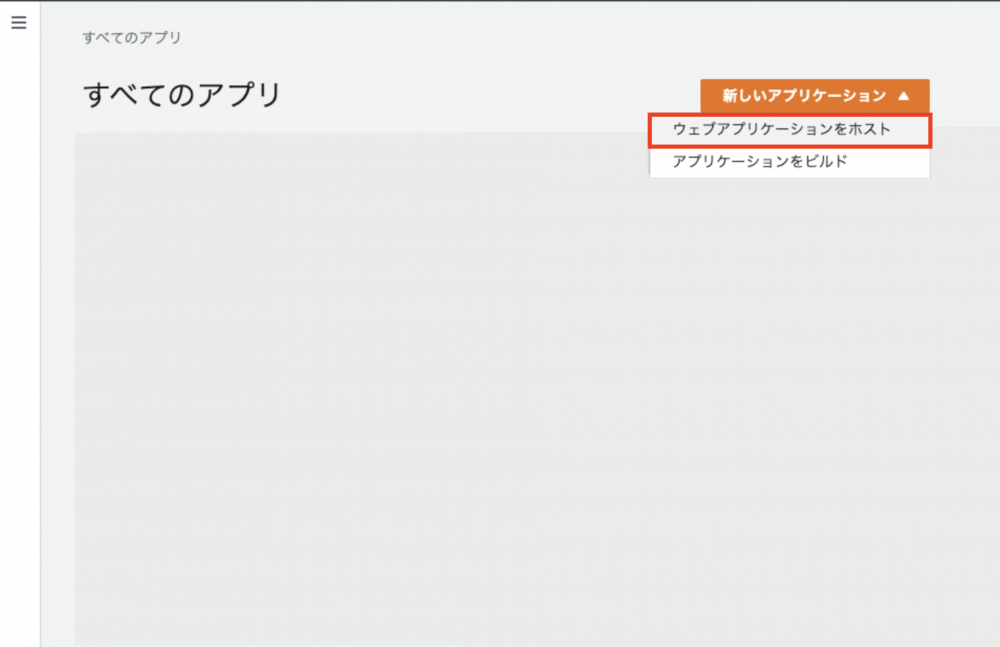
AWSにログインしAmplifyコンソールからReactアプリをデプロイします。
「ウェブアプリケーションをホスト」を選択
「GitHub」を選択し「続行」をクリック

GitHubの認証が成功すると、以下の画面が表示されます。
作成したリポジトリ/ブランチを選択し、「次へ」をクリック
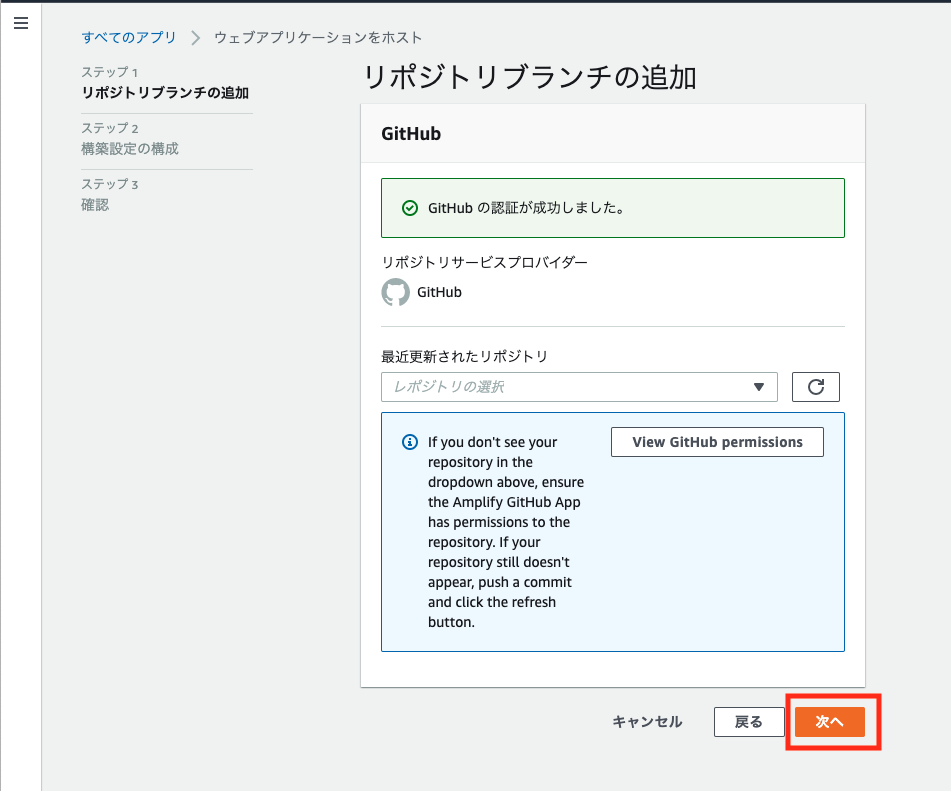
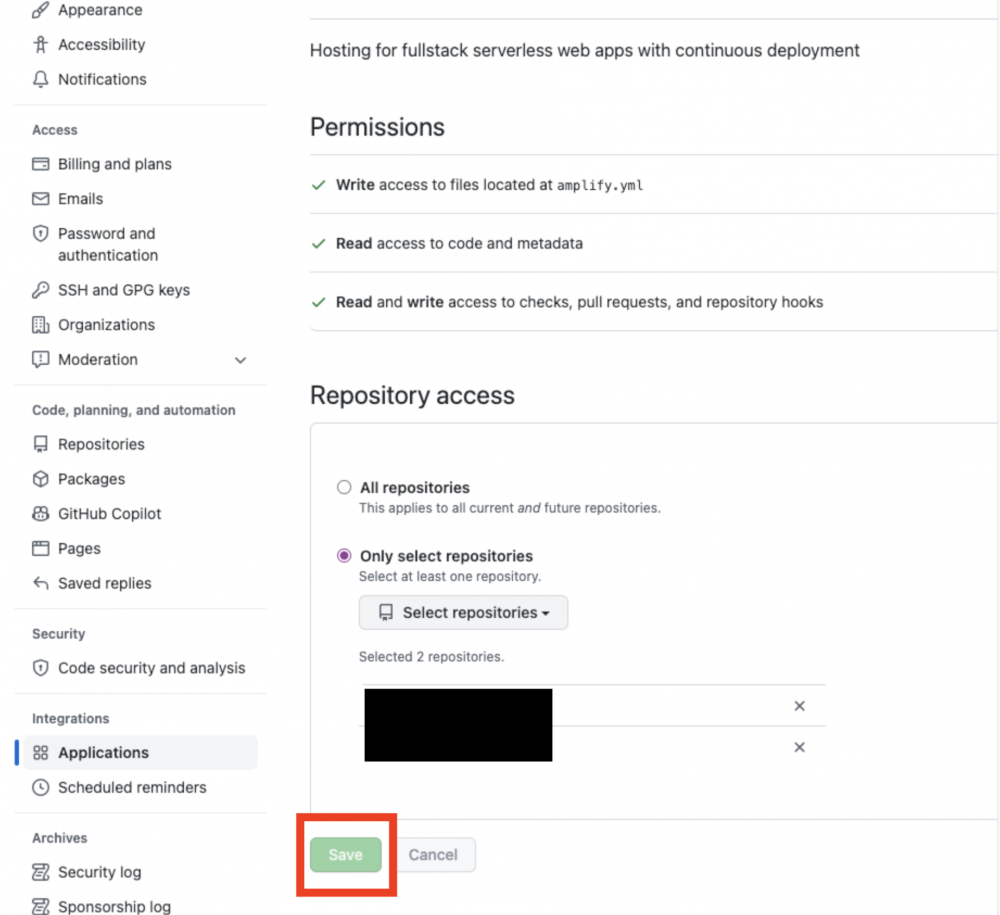
※作成したリポジトリ/ブランチがない場合は、「View GitHub Permissions」を押して権限を追加します
リポジトリを選択し、「Save」をクリック
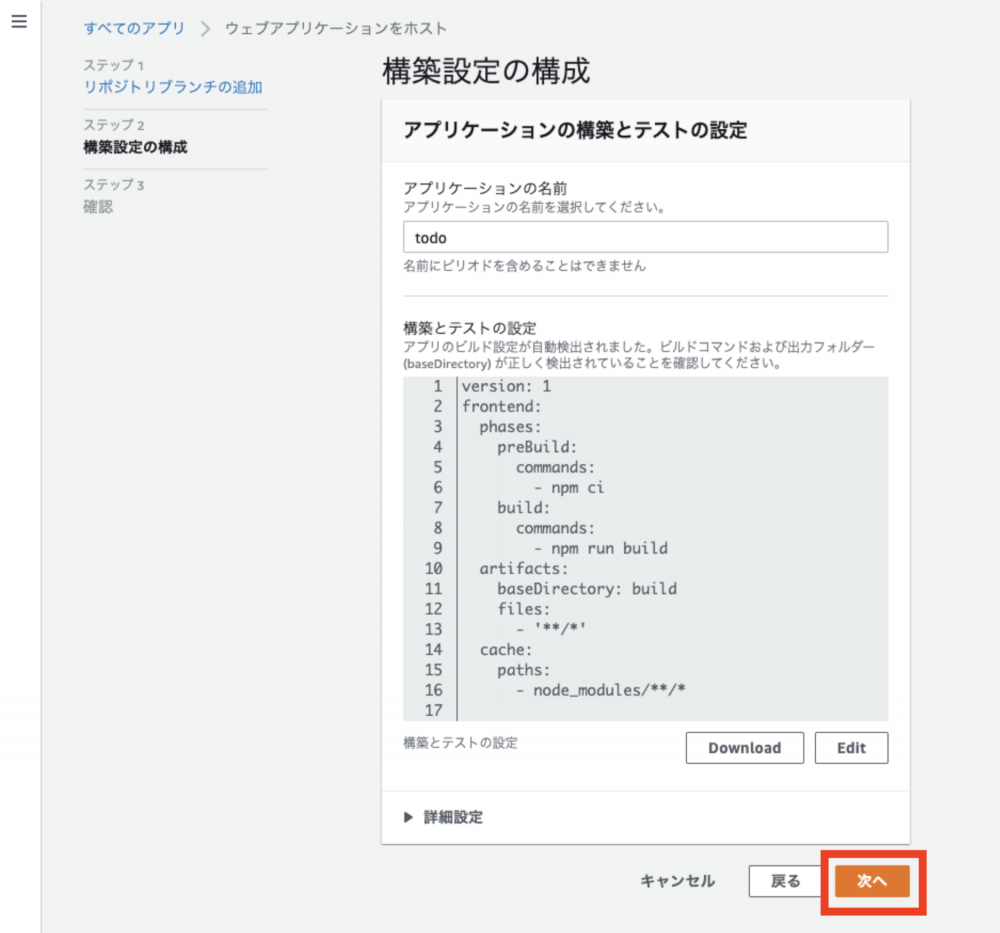
そのまま「次へ」をクリック
内容を確認し、「保存してデプロイ」をクリック
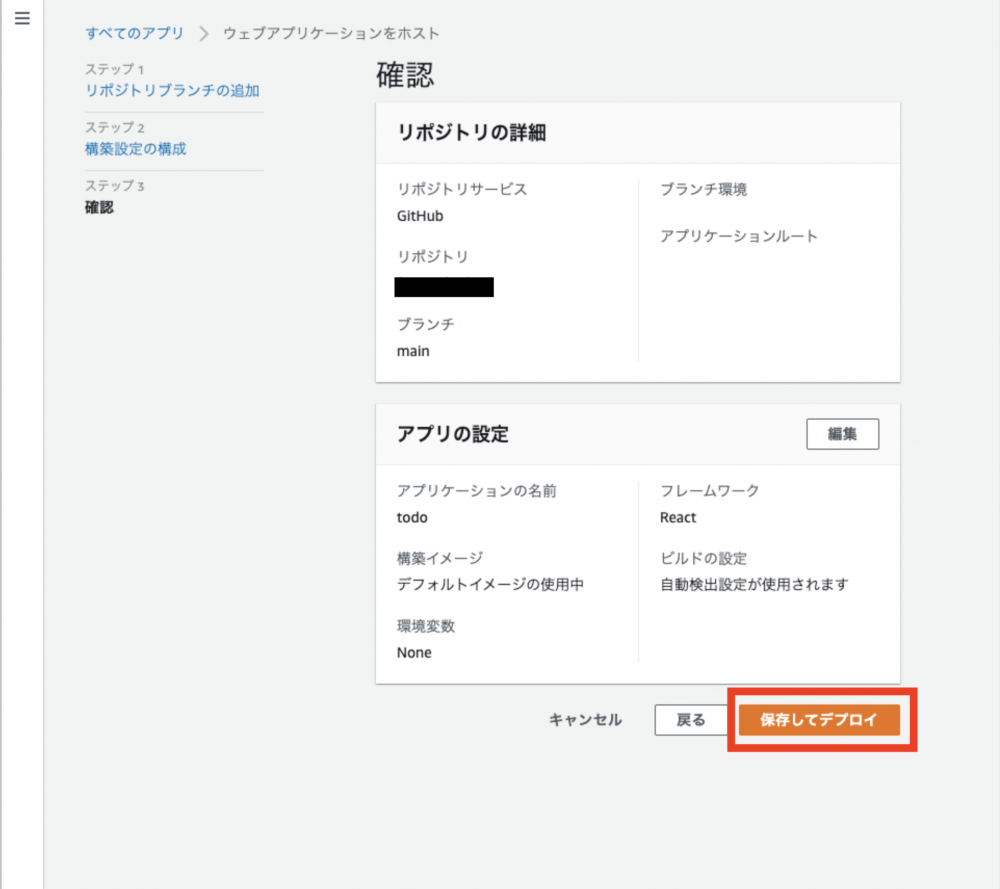
数分待つと、デプロイが完了しました

次にローカルでAmplifyアプリを初期化します。
まずAmplify CLIをインストールします
Amplify CLIとは各種AWSサービスを簡単に利用できる、コマンドベースのツールです。
| npm install -g @aws-amplify/cli |
| amplify configure |
| Follow these steps to set up access to your AWS account: |
| Sign in to your AWS administrator account: |
| https://console.aws.amazon.com/ |
| Press Enter to continue |
画面が表示されますが、コンソール通りにEnterをクリック
リージョン、名前を入力するとIAMユーザー作成画面が表示されます
| Specify the AWS Region |
| ? region: ap-northeast-1 |
| Specify the username of the new IAM user: |
| ? user name: xxxxxx |
| Complete the user creation using the AWS console |
| https://console.aws.amazon.com/iam/home?region=ap-northeast-1#/users$new?step=final&accessKey&userNames=amplify-user&permissionType=policies&policies=arn:aws:iam::aws:policy%2FAdministratorAccess-Amplify |
| Press Enter to continue |
ユーザー名を入力し、「次のステップ」をクリック
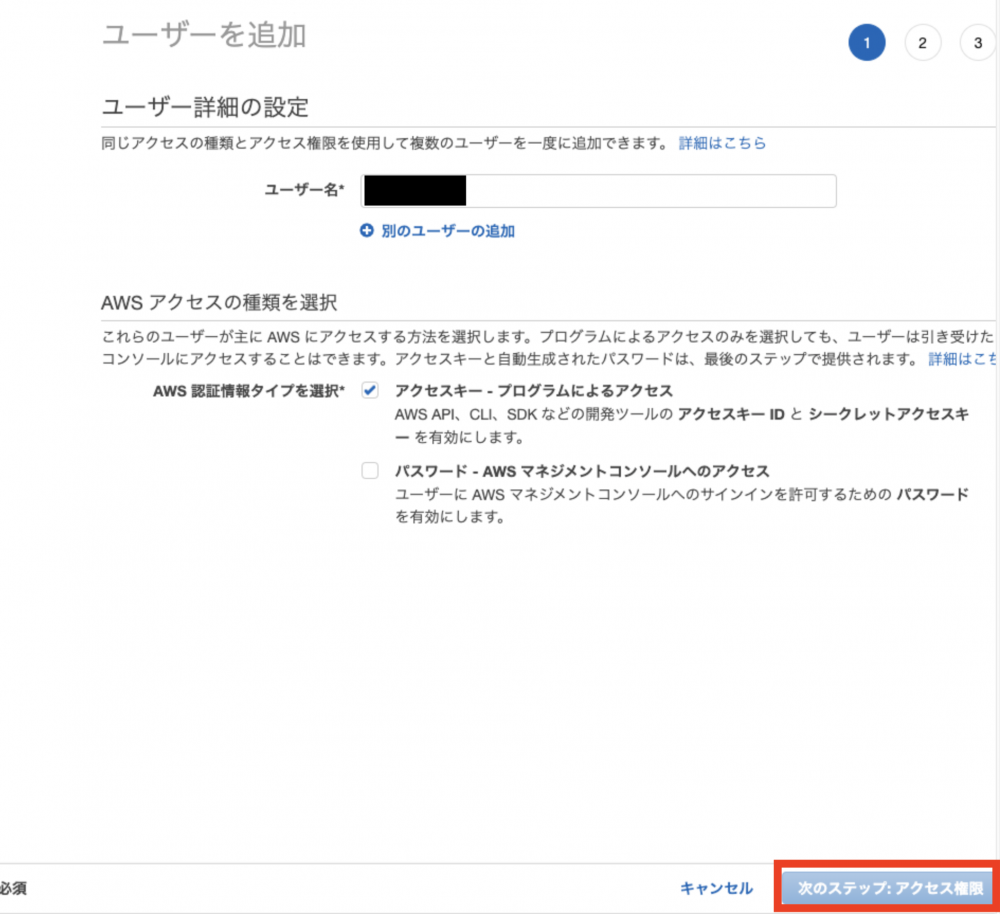
既存のポリシーが選択されているので、そのまま「次のステップ」をクリック
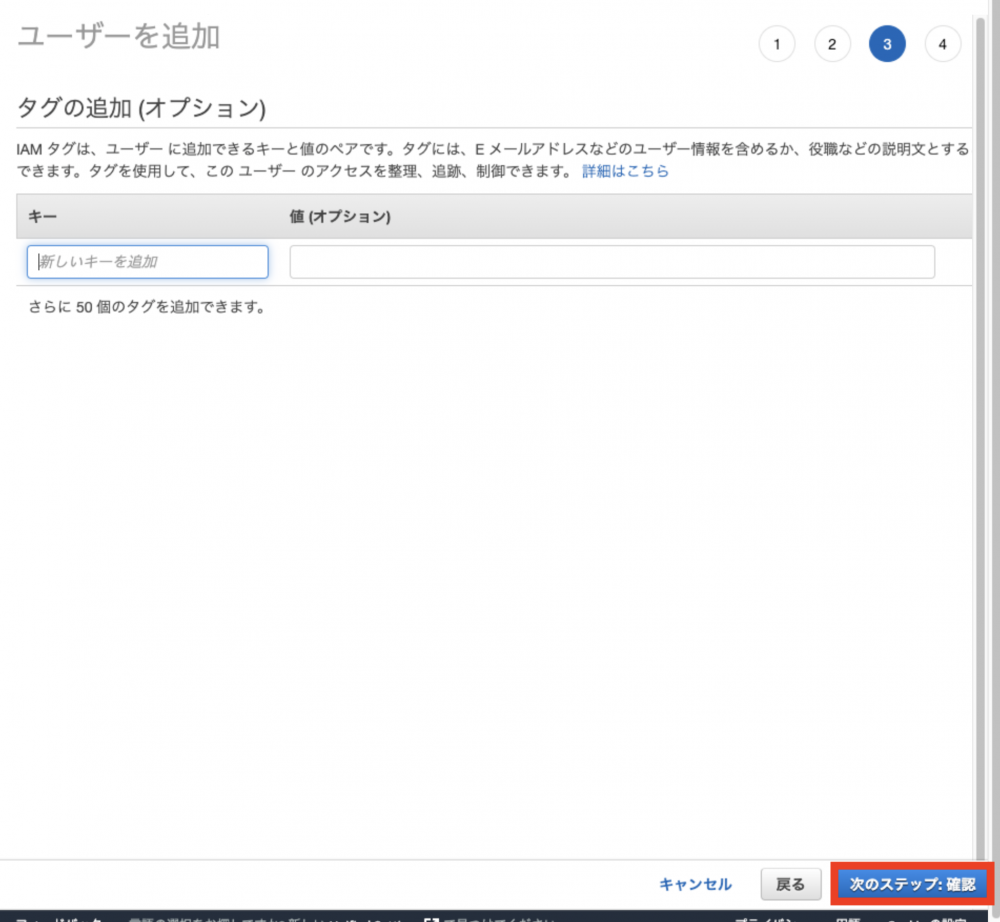
こちらもなにもせずに、「次のステップ」をクリック
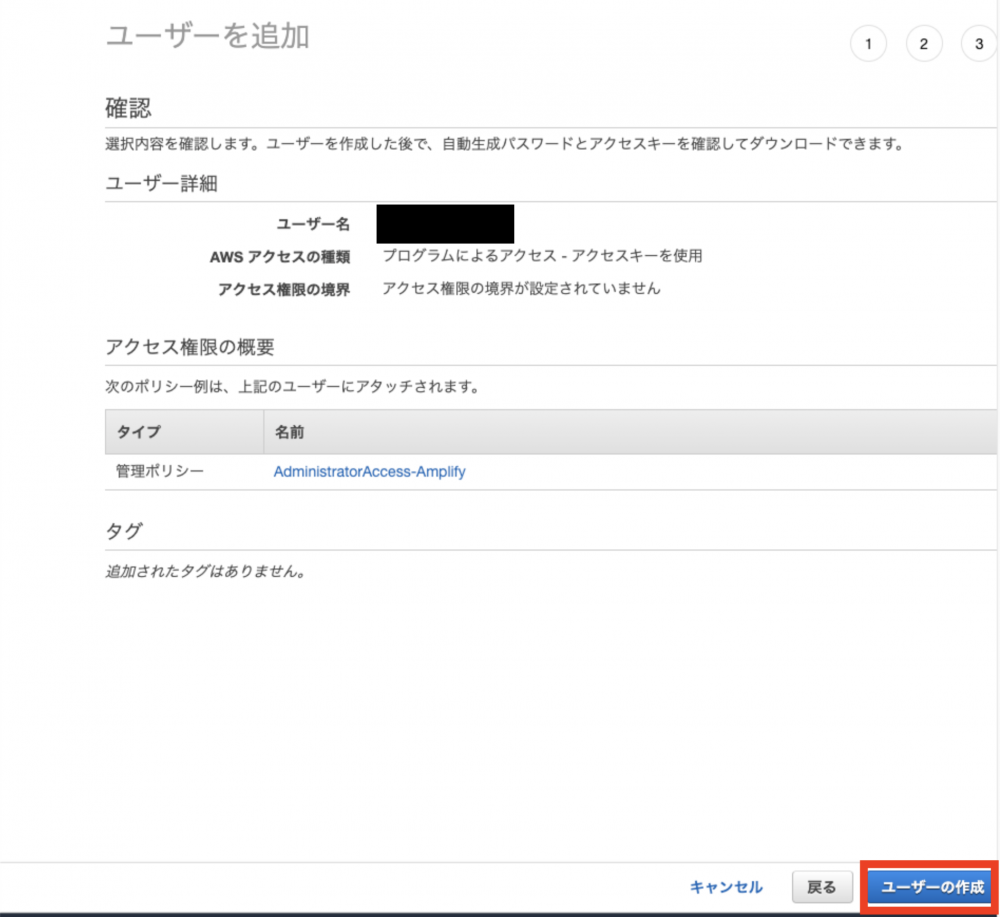
内容を確認し、「ユーザーの作成」をクリック
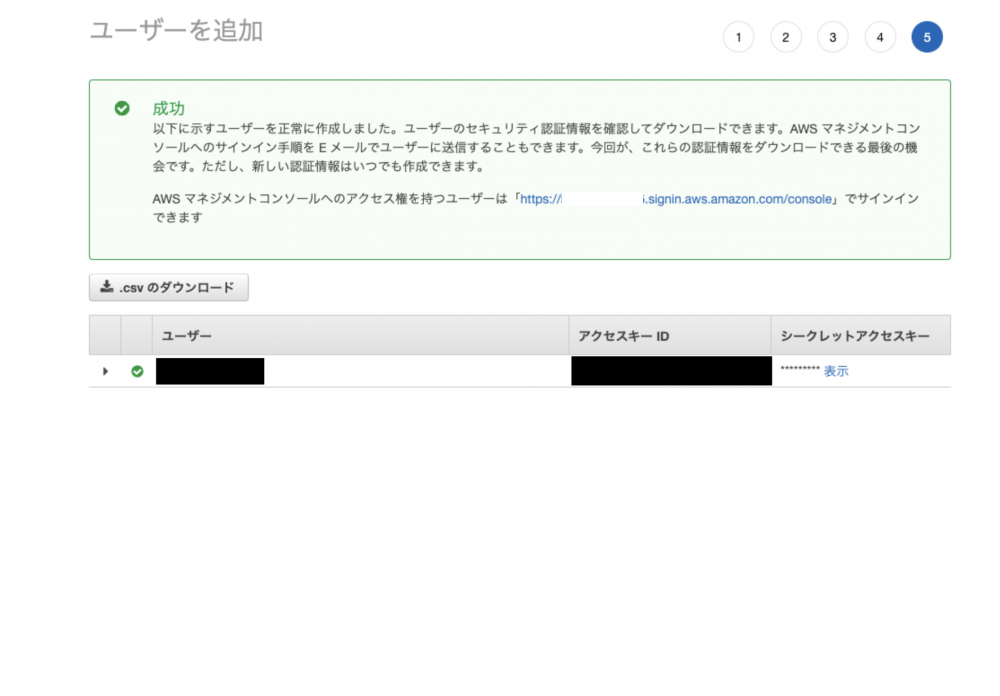
認証情報(CSV)をダウンロードします
ターミナル(プロンプト)に戻り、Enter
先ほどの作成したアクセスID,アクセスキーを入力します
| Enter the access key of the newly created user: |
| ? accessKeyId: ******************** |
| ? secretAccessKey: **************************************** |
| This would update/create the AWS Profile in your local machine |
| ? Profile Name: default |
| Successfully set up the new user. |
Amplify CLIの設定は完了したので、Amplify プロジェクトを初期化します
「-appId」は「アプリの設定」→「全般」→「アプリケーション ARN」の/までの末尾です
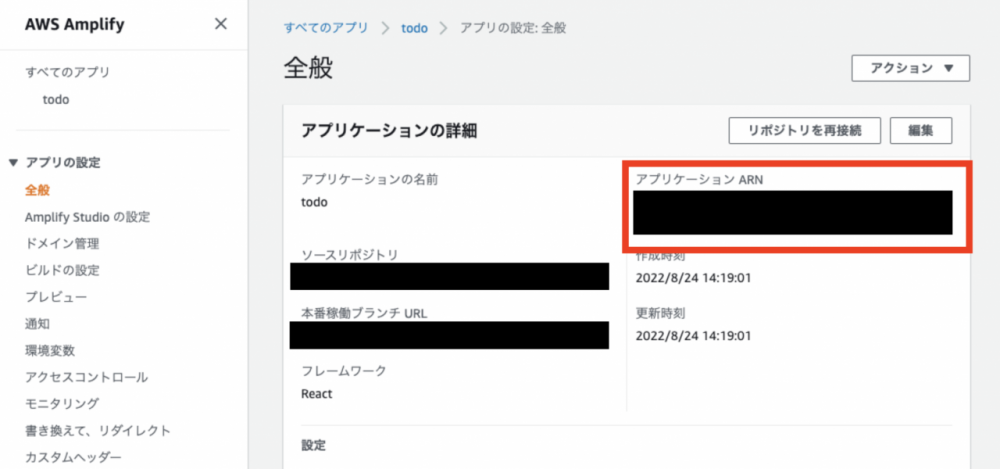
| amplify init --appId xxxxx |
| Note: It is recommended to run this command from the root of your app directory |
| ? Enter a name for the project todo |
| The following configuration will be applied: |
| Project information |
| | Name: xxxxx |
| | Environment: dev |
| | Default editor: Visual Studio Code |
| | App type: javascript |
| | Javascript framework: react |
| | Source Directory Path: src |
| | Distribution Directory Path: build |
| | Build Command: npm run-script build |
| | Start Command: npm run-script start |
| ? Initialize the project with the above configuration? Yes |
| Using default provider awscloudformation |
| ? Select the authentication method you want to use: AWS profile |
| For more information on AWS Profiles, see: |
| https://docs.aws.amazon.com/cli/latest/userguide/cli-configure-profiles.html |
| ? Please choose the profile you want to use xxxxx |
| Amplify AppID found: xxxx. Amplify App name is: xxxxx |
| Adding backend environment dev to AWS Amplify app: xxxx |
| ⠇ Initializing project in the cloud... |
| ~省略~ |
| Pro tip: |
| Try "amplify add api" to create a backend API and then "amplify push" to deploy everything |
以下のAmplify ライブラリをインストールします
AWSサービスとやり取りするためのaws-amplify ライブラリ
固有のUIコンポーネントの@ aws-amplify/ui-react ライブラリ
| npm install aws-amplify @aws-amplify/ui-react |
認証サービスをAmplifyプロジェクトに追加します。
| amplify add auth |
| Using service: Cognito, provided by: awscloudformation |
| The current configured provider is Amazon Cognito. |
| Do you want to use the default authentication and security configuration? Defau |
| lt configuration |
| Warning: you will not be able to edit these selections. |
| How do you want users to be able to sign in? Username |
| Do you want to configure advanced settings? No, I am done. |
| ✅ Successfully added auth resource todoca616e84 locally |
| ✅ Some next steps: |
| "amplify push" will build all your local backend resources and provision it in the cloud |
| "amplify publish" will build all your local backend and frontend resources (if you have hosting category added) and provision it in the cloud |
「–y」オプションで全ての質問に「yes」を設定します。
| amplify push --y |
| ~省略~ |
| ✔ All resources are updated in the cloud |
src/index.jsを開き、最後のインポートの下に次のコードを追加します
| import Amplify from 'aws-amplify'; |
| import config from './aws-exports'; |
| Amplify.configure(config);- src/App.jsに認証フローを追加 |
App.jsを次のコードに更新します。
※チュートリアルのコードではライブラリのバージョンが使用できなかったため、以下のインポート文を追加しています
| import '@aws-amplify/ui-react/styles.css'; |
| import React from 'react'; |
| import logo from './logo.svg'; |
| import './App.css'; |
| import { withAuthenticator } from '@aws-amplify/ui-react' |
| import '@aws-amplify/ui-react/styles.css'; |
| function App({ signOut, user }) { |
| return ( |
| <div className="App"> |
| <header> |
| <img src={logo} className="App-logo" alt="logo" /> |
| <h1>Hello {user.username}</h1> |
| <button onClick={signOut}>Sign out</button> |
| </header> |
| </div> |
| ); |
| } |
| export default withAuthenticator(App); |
以下の認証画面が表示されます。

GraphQL APIをアプリに追加します。
次のコマンドを実行します。
| amplify add api |
| ? Select from one of the below mentioned services: GraphQL |
| ? Here is the GraphQL API that we will create. Select a setting to edit or conti |
| nue Continue |
| ? Choose a schema template: Single object with fields (e.g., “Todo” with ID, nam |
| e, description) |
| ⚠️ WARNING: your GraphQL API currently allows public create, read, update, and delete access to all models via an API Key. To configure PRODUCTION-READY authorization rules, review: https://docs.amplify.aws/cli/graphql/authorization-rules |
| ✅ GraphQL schema compiled successfully. |
| Edit your schema at /Users/fukuharatakuya/aws/react/todoapp/amplify/backend/api/todo/schema.graphql or place .graphql files in a directory at /Users/fukuharatakuya/aws/react/todoapp/amplify/backend/api/todo/schema |
| ✔ Do you want to edit the schema now? (Y/n) · yes |
| Edit the file in your editor: /Users/fukuharatakuya/aws/react/todoapp/amplify/backend/api/todo/schema.graphql |
| ✅ Successfully added resource todo locally |
| ✅ Some next steps: |
| "amplify push" will build all your local backend resources and provision it in the cloud |
| "amplify publish" will build all your local backend and frontend resources (if you have hosting category added) and provision it in the cloud |
Shema.graphqlファイルを以下に更新します。
| type Note @model { |
| id: ID! |
| name: String! |
| description: String |
| } |
| amplify push --y |
Src/App.jsを次のコードで更新します。
| import React, { useState, useEffect } from 'react'; |
| import logo from './logo.svg'; |
| import './App.css'; |
| import { withAuthenticator } from '@aws-amplify/ui-react' |
| import '@aws-amplify/ui-react/styles.css'; |
| import { API } from 'aws-amplify'; |
| import { listNotes } from './graphql/queries'; |
| import { createNote as createNoteMutation, deleteNote as deleteNoteMutation } from './graphql/mutations'; |
| const initialFormState = { name: '', description: '' } |
| function App({ signOut, user }) { |
| const [notes, setNotes] = useState([]); |
| const [formData, setFormData] = useState(initialFormState); |
| useEffect(() => { |
| fetchNotes(); |
| }, []); |
| async function fetchNotes() { |
| const apiData = await API.graphql({ query: listNotes }); |
| setNotes(apiData.data.listNotes.items); |
| } |
| async function createNote() { |
| if (!formData.name || !formData.description) return; |
| await API.graphql({ query: createNoteMutation, variables: { input: formData } }); |
| setNotes([ ...notes, formData ]); |
| setFormData(initialFormState); |
| } |
| async function deleteNote({ id }) { |
| const newNotesArray = notes.filter(note => note.id !== id); |
| setNotes(newNotesArray); |
| await API.graphql({ query: deleteNoteMutation, variables: { input: { id } }}); |
| } |
| return ( |
| <div className="App"> |
| <h1>My Notes App</h1> |
| <input |
| onChange={e => setFormData({ ...formData, 'name': e.target.value})} |
| placeholder="Note name" |
| value={formData.name} |
| /> |
| <input |
| onChange={e => setFormData({ ...formData, 'description': e.target.value})} |
| placeholder="Note description" |
| value={formData.description} |
| /> |
| <button onClick={createNote}>Create Note</button> |
| <div style={{marginBottom: 30}}> |
| { |
| notes.map(note => ( |
| <div key={note.id || note.name}> |
| <h2>{note.name}</h2> |
| <p>{note.description}</p> |
| <button onClick={() => deleteNote(note)}>Delete note</button> |
| </div> |
| )) |
| } |
| </div> |
| <img src={logo} className="App-logo" alt="logo" /> |
| <h1>Hello {user.username}</h1> |
| <button onClick={signOut}>Sign out</button> |
| </div> |
| ); |
| } |
| export default withAuthenticator(App); |
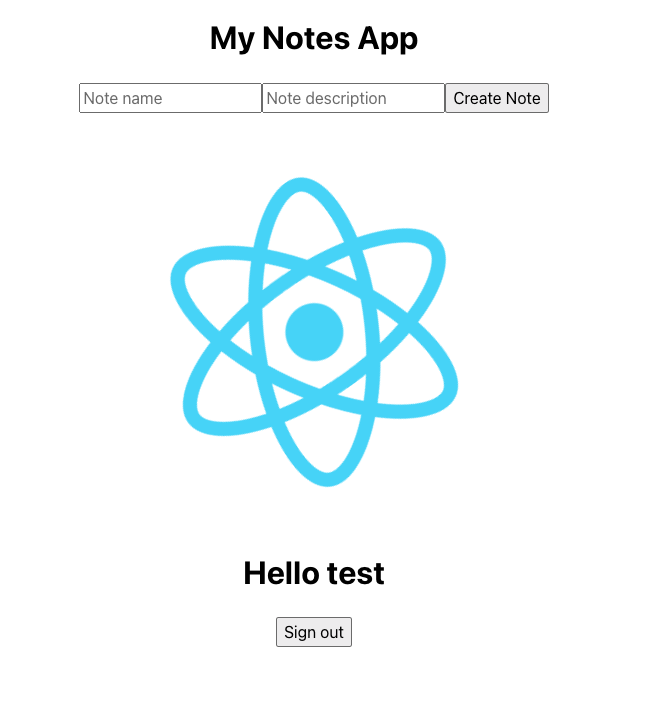
アプリを実行してみると、メモアプリが追加されました。
画像用のストレージを追加します。
| amplify add storage |
| ? Select from one of the below mentioned services: Content (Images, audio, video, etc.) |
| ✔ Provide a friendly name for your resource that will be used to label this category in the project: · imageStorage |
| ✔ Provide bucket name: · test-amplify-image-storage-xxx |
| ✔ Who should have access: · Auth users only |
| ✔ What kind of access do you want for Authenticated users? · create/update, read, delete |
| ✔ Do you want to add a Lambda Trigger for your S3 Bucket? (y/N) · no |
| ✅ Successfully added resource imageStorage locally |
| ⚠️ If a user is part of a user pool group, run "amplify update storage" to enable IAM group policies for CRUD operations |
| ✅ Some next steps: |
| "amplify push" builds all of your local backend resources and provisions them in the cloud |
| "amplify publish" builds all of your local backend and front-end resources (if you added hosting category) and provisions them in the cloud |
画像をアップロードするために、Shema.graphqlファイルを以下に更新します。
| type Note @model { |
| id: ID! |
| name: String! |
| description: String |
| image: String |
| } |
| amplify push --y |
Src/App.jsを次のコードで更新します。
| import React, { useState, useEffect } from 'react'; |
| import logo from './logo.svg'; |
| import './App.css'; |
| import { withAuthenticator } from '@aws-amplify/ui-react' |
| import '@aws-amplify/ui-react/styles.css'; |
| import { API, Storage } from 'aws-amplify'; |
| import { listNotes } from './graphql/queries'; |
| import { createNote as createNoteMutation, deleteNote as deleteNoteMutation } from './graphql/mutations'; |
| const initialFormState = { name: '', description: '' } |
| function App({ signOut, user }) { |
| const [notes, setNotes] = useState([]); |
| const [formData, setFormData] = useState(initialFormState); |
| useEffect(() => { |
| fetchNotes(); |
| }, []); |
| async function onChange(e) { |
| if (!e.target.files[0]) return |
| const file = e.target.files[0]; |
| setFormData({ ...formData, image: file.name }); |
| await Storage.put(file.name, file); |
| fetchNotes(); |
| } |
| async function fetchNotes() { |
| const apiData = await API.graphql({ query: listNotes }); |
| const notesFromAPI = apiData.data.listNotes.items; |
| await Promise.all(notesFromAPI.map(async note => { |
| if (note.image) { |
| const image = await Storage.get(note.image); |
| note.image = image; |
| } |
| return note; |
| })) |
| setNotes(apiData.data.listNotes.items); |
| } |
| async function createNote() { |
| if (!formData.name || !formData.description) return; |
| await API.graphql({ query: createNoteMutation, variables: { input: formData } }); |
| if (formData.image) { |
| const image = await Storage.get(formData.image); |
| formData.image = image; |
| } |
| setNotes([ ...notes, formData ]); |
| setFormData(initialFormState); |
| } |
| async function deleteNote({ id }) { |
| const newNotesArray = notes.filter(note => note.id !== id); |
| setNotes(newNotesArray); |
| await API.graphql({ query: deleteNoteMutation, variables: { input: { id } }}); |
| } |
| return ( |
| <div className="App"> |
| <h1>My Notes App</h1> |
| <input |
| onChange={e => setFormData({ ...formData, 'name': e.target.value})} |
| placeholder="Note name" |
| value={formData.name} |
| /> |
| <input |
| onChange={e => setFormData({ ...formData, 'description': e.target.value})} |
| placeholder="Note description" |
| value={formData.description} |
| /> |
| <input |
| type="file" |
| onChange={onChange} |
| /> |
| <button onClick={createNote}>Create Note</button> |
| <div style={{marginBottom: 30}}> |
| { |
| notes.map(note => ( |
| <div key={note.id || note.name}> |
| <h2>{note.name}</h2> |
| <p>{note.description}</p> |
| <button onClick={() => deleteNote(note)}>Delete note</button> |
| { |
| note.image && <img src={note.image} style={{width: 400}} /> |
| } |
| </div> |
| )) |
| } |
| </div> |
| <img src={logo} className="App-logo" alt="logo" /> |
| <h1>Hello {user.username}</h1> |
| <button onClick={signOut}>Sign out</button> |
| </div> |
| ); |
| } |
| export default withAuthenticator(App); |
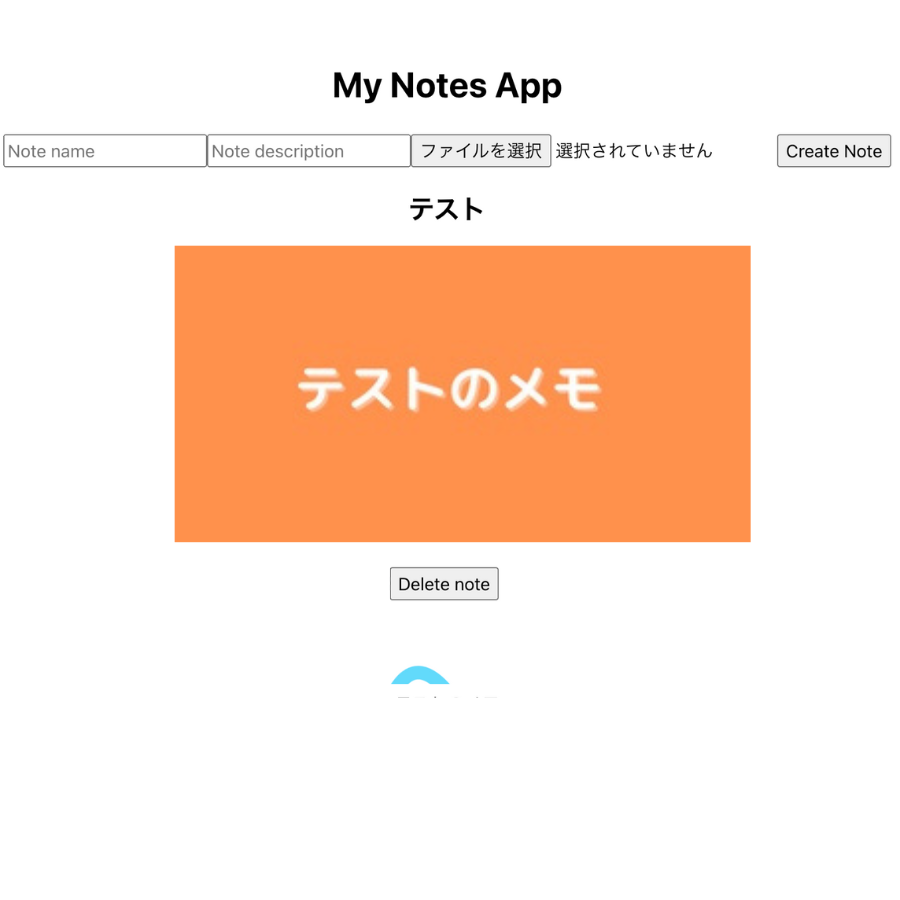
テストのメモと画像をアップロードできました。
バックエンドの部分や認証機能など簡単に設定できました。
今回はチュートリアルに沿って作成しましたが、
機能拡張や他のWEBアプリなどを作成できるようにAWSの勉強を続けていきたいと思います。